Server Prerequisites
Before installing, confirm the target host meets the Customer-Provided Infrastructure Overview requirements, in particular:
-
The Admin Portal must be installed on a dedicated Windows Server (physical or virtual).
-
The host must not be co-located with other production workloads such as ACS, domain controller, SCCM, antivirus management console, or file server.
-
Shared hosts are a frequent cause of slow searches, intermittent service crashes, and enrollment timeouts.
Installation Permissions
Ensure the Windows Account used for the installation has local Administrative privileges on the machine where the Alcatraz AI Platform will be installed.
- Locate the Installer file – ex. Alcatraz-admin-portal-win-3.6.0.exe.
- Right-click the installer file and select "Run as Administrator" to begin the installation.
- Read and agree to the "License Agreement."

- Select the install locations for the Alcatraz AI Platform. Click
Browse...for each of the three fields (Installation directory, Data directory, Backup directory) and select the respective locations where the AHP Platform components should be installed. Note: It is recommended that the "Data" and "Backup" directories be placed on a drive sized according to the Alcatraz Platform system requirements. For a small system and short-term use, a drive with at least 100GB of free space could be used.
- Select "Login type" from one of the following:
- Local System Account (default) – Integrated with Windows. Services will run under the local system account on the server.
- This Account – Typically used with a Windows domain account. Enter the Username and Password for the account you want to use. NOTE: The account used must have administrator privileges on the server running the Alcatraz software, and the "Log on as a service" user right needs to be assigned.

- Select the preferred database engine:
- PostgreSQL (default) - PostgreSQL will be installed automatically by the application.
- Microsoft SQL Server - You will need to provide or install an instance of MSSQL.

- PostgreSQL Specific Settings:
- Select
Browse...to change the default location for the installation and data files. - Port - 5432 (default) - It is recommended to use the default setting
- Superuser Password - It is recommended to use the default password. CAUTION: If you change the password, be sure to make a note of it. Losing the superuser password may result in loss of data access.
- Retype Superuser Password - This is only required if changed from the default.

- Select
- Microsoft SQL Server Specific Settings:
- Enter the "Server Name" and "Database Name".
- Select the preferred "Login Type." Note: the associated database user should have db_owner permissions for the database named.
- Windows - The account specified in Step 5 will be used to access the MS SQL database.
- SQL - Enter the "Login" and "Password" for an account created in MS SQL.
- Storage Type - Check the box for "Database" to store all data in the MS SQL database
- Select
Test Connectionto validate the connection settings.
- Select certificate settings:
- Use self-signed certificate for Web application (default) - The application will self-sign a certificate to be used for secure access to the Admin Portal.
- Use custom certificate for Web application - Provide a certificate via the Windows Certificate Store to be used for secure access to the Admin Portal.

- Check "Setup NTP Server" if you want the application to automatically configure the server to provide NTP services. This may be necessary for an air-gapped installation where the Rocks will not have access to a local or public NTP server.

- Enter service endpoint settings. Note: It is recommended to use the default settings. CAUTION: changing the ‘Devices Service Listen Port’ after Rocks have been onboarded to the system will cause them to lose communications unless they are deleted and then re-onboarded to the Alcatraz Platform.
- Devices Service Listen Port - 8443 (default)
- Public Service Listen Port - 443 (default)
- Create Firewall Rules - Check the box (default)
- Select
Check Ports Availabilityto confirm the entered ports are open and available. If the Alcatraz Services are already running on the server, these ports may not be available. This may occur when modifying an existing installation or upgrading the Platform software.
- "Enable Remote Assistance" can remain unchecked for most installations.

- High availability requires a separate license and additional infrastructure to implement. Contact your Alcatraz AI account manager for more details.

- When the installation is complete, be sure to note the randomly generated Admin password that is displayed, as this will be needed to log into the Admin Portal.
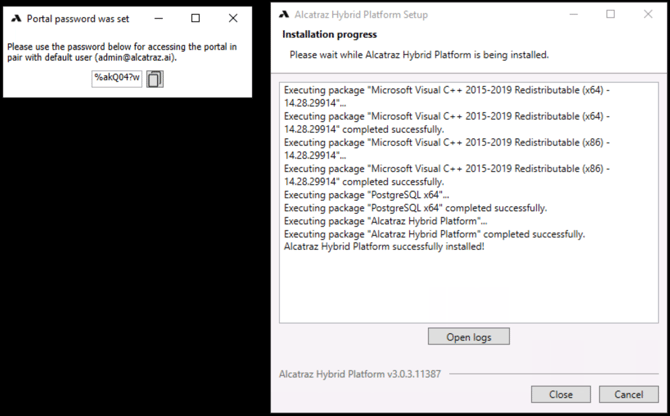
- After noting the Admin password, select
Closeto exit the installer. - Details for accessing the Admin Portal can be found here: Accessing the Admin Portal
How to modify the installation or uninstall the application
- Right-click the alcatraz-admin-portal-win-x.x.x.exe file and select "Run as Administrator."
- Select an option:
Configure,Modify, orUninstall.
- Select
Configureto select a custom certificate from the Windows Certificate Store.
- Select
Modifyto make changes to the installation.
- Select
Uninstallto remove the Alcatraz Platform application. - When uninstalling, you can choose to delete or retain the application database and data files.
