Installation Process
Ensure the Windows Account used for the installation has local Administrative privileges on the machine where Alcatraz AI Platform will be installed.
1. Locate the Installer File – ex. AlcatrazAI-admin-portal-2.7.2-5081.exe.
2. Double click on the AlcatrazAI-admin-portal-x.x.x-xxxx.exe file to run installation.
3. License Terms screen will open. ■ Read the License Agreement.
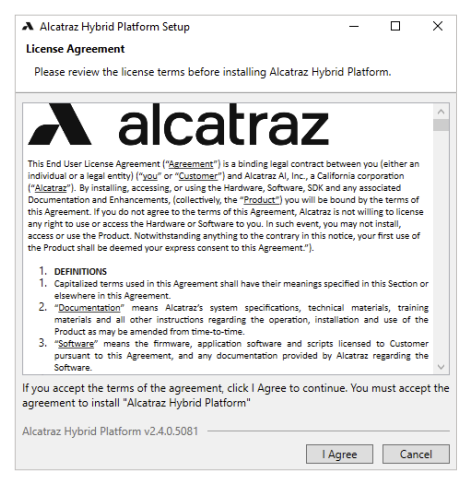
4. Click I Agree button to continue Alcatraz Hybrid Platform Setup. (Click Cancel to stop Setup Installation if needed.)
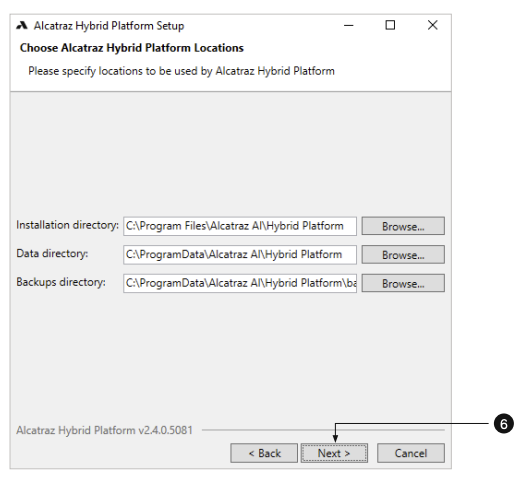
5. Select install locations for the Alcatraz AI Platform ■ Click on Browse for each of the 3 fields (Installation directory, Data directory, Backup directory) and select the respective locations where the AHP Platform components should be installed. (Default directory paths will appear in each of the fields.)
6. Click Next to continue (click Back to return to previous setup screen or Cancel to stop setup if needed).
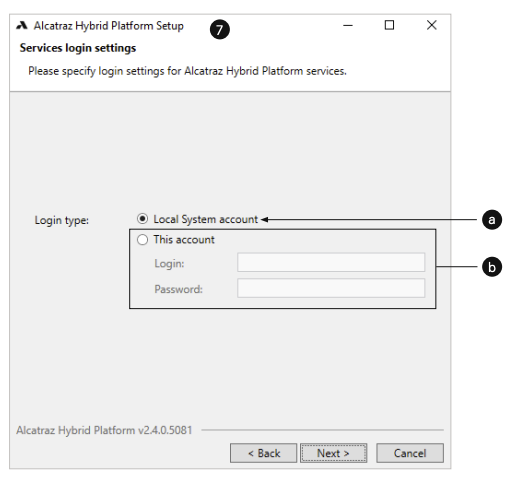
7. Services Login Settings – select Login type from one of the following, suitable for your organization policy
a.Local System account – integrated with Windows. Services will run under the Local System account on the serve.
b.This account – provide Username and Password for a custom account you want to use. NOTE: The account used must have administrator privileges for the server running the Alcatraz software.
8. Click Next to continue.
9. PostgreSQL Settings Database
■ Click on Browse fields to select the installation and the data directories. (Default directory paths will appears in each of the fields.)
■ Port for connecting to PostgreSQL database, (Default ports will be suggested.)
■ Superuser password is prepopulated
Note: if you change it, make a note of it and save it. Re-enter Superuser Password, only if you changed it.
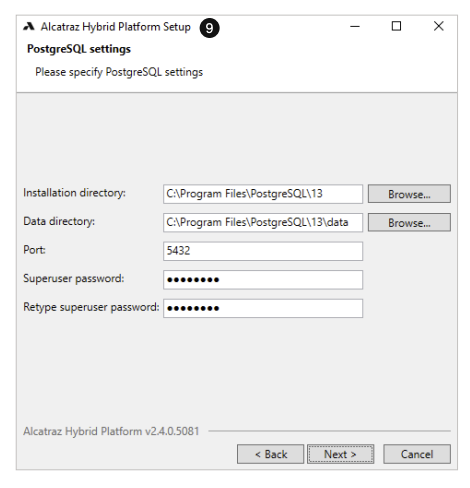
10. Click Next to continue.
11. Certificate Settings – configure certificate to be used for the Alcatraz Admin Portal Web Application. Recommended section options are selected by default.
a.Generate certificates option – selected by default.
■ Platform hostname/IP address is prepopulated.
■ IP addresses to include (in the certificate) – also selected by default.
b.Select Use Existing Certificate, if one was previously generated
■ Select Use Custom Certificates for Web Application, if you want to use your own certificate which has been imported in the Windows Certificate Store.
■ Select certificate from the drop-down list below.
12. Click Next to continue.
13. NTP Service Settings – select Setup NTP server, if you want to setup a Network Time Protocol Server to ensure time synchronization between devices connected to the Alcatraz Hybrid Platform.
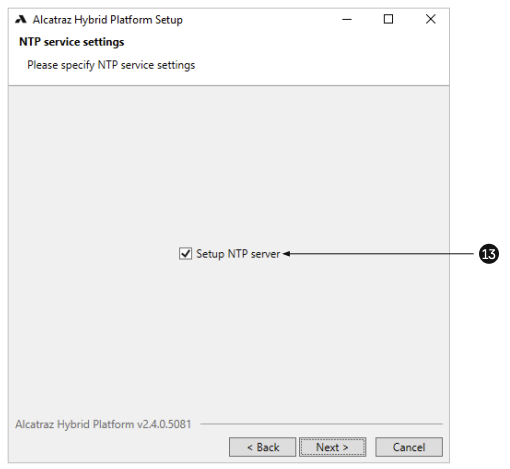
14. Click Next to continue.
15. Services Endpoints Settings
a.For Devices service enter IP address and Listen port: default 8443 (recommended). This address will be used to connect devices to the Alcatraz AI Platform.
b.For Public service enter Listen port: default 443 (recommended).
CAUTION: changing the ‘Devices Service’ ‘Listen Port’ after Rocks have been onboarded to the system will cause them to lose communications unless they are deleted and then re-onboarded to the Alcatraz Platform.
■ Select Create Firewall rules to ensure that Firewall rules that allow the required connections are automatically generated.
■ Click Check Port availability to verify that selected ports are available.
Note: when re-installing, or upgrading this software, pressing ‘Check ports availability’, may indicate that named Ports are in use by the current installation of this software. It is safe to leave that Ports as they are in this case.
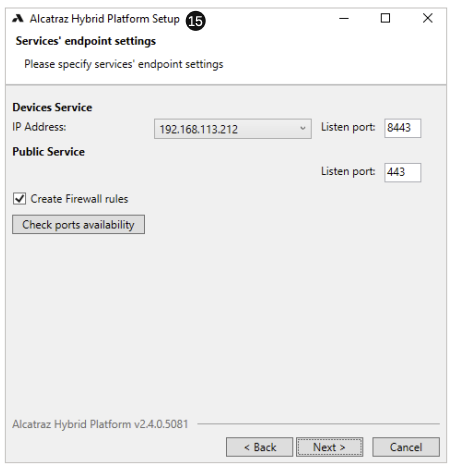
16. Click Next to continue.
17. Enabling the Remote Assistance Settings is optional. If there is no need configuring the section just click Next and continue to step 18 (page 9). If selecting to enable the remote assistance please follow the steps from 17.1 to 17.4 (page 8).
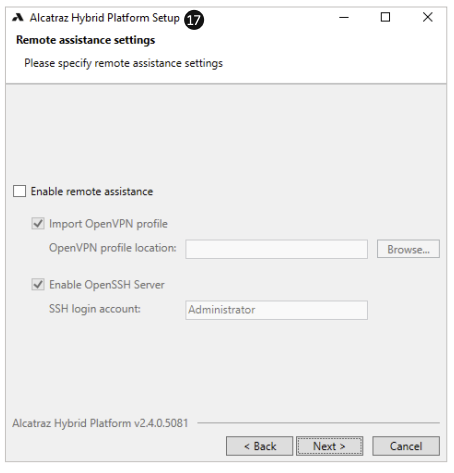
17.1 After enabling the remote assistance, select Import OpenVPN profile.
■ Enter OpenVPN remote assistance Profile location, or click on Browse to locate the directory where the profile is stored.
■ Select Enable OpenSSH Server if you want to enable remote support sessions via the SSH Protocol. Enter SSH login account.
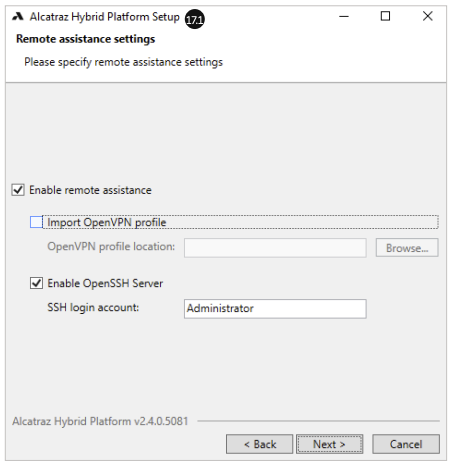
17.2 Click Next to continue.
17.3 Enabling Windows Features
Note: this screen will appear only if additional Windows features are needed.
a.Please wait for the Installer to enumerate Windows Features on the server where the installation is taking place. (Back and Next buttons are disabled. Click Cancel to stop installation if needed).
b.Select listed Windows Features once they become active and click the Enable button.
c.Please wait while selected Windows Features are being applied. (Click Cancel to stop installation if needed).
d.Selected Windows Features are applied – the green checkmark indicates the successful enabling of the selected feature.
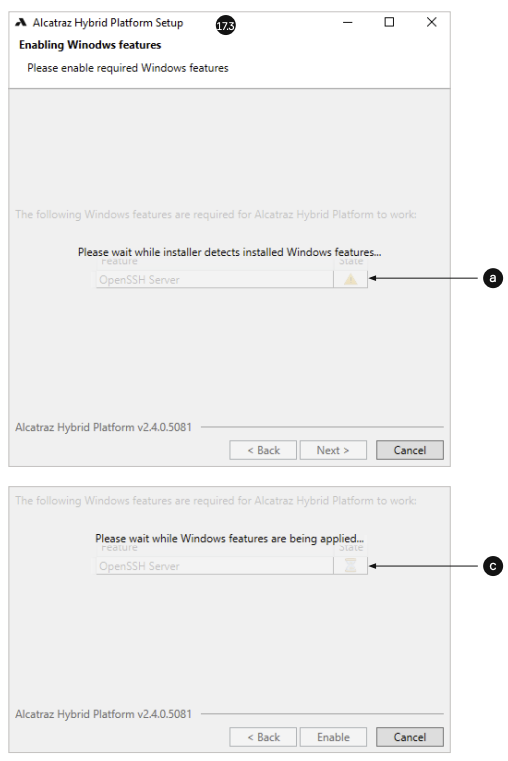
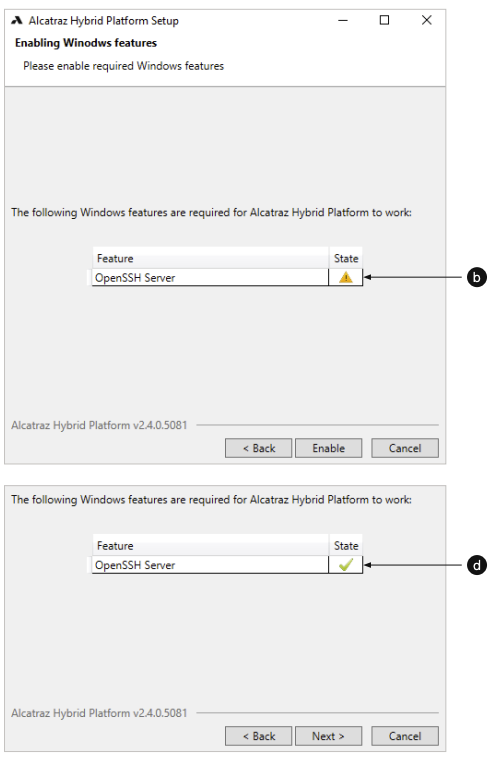
17.4 Click Next to continue.
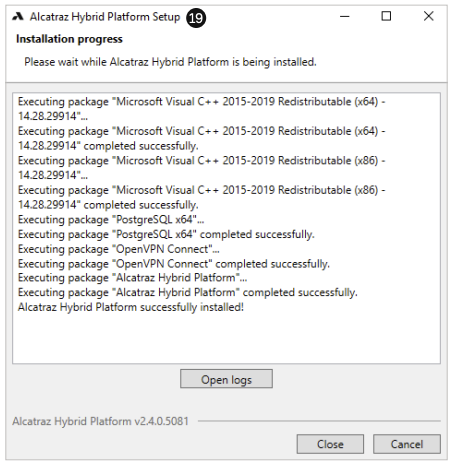
18. Installation Progress
Note: Installation is in progress – log messages from each installation step will appear.
Close button is disabled while installation is in progress
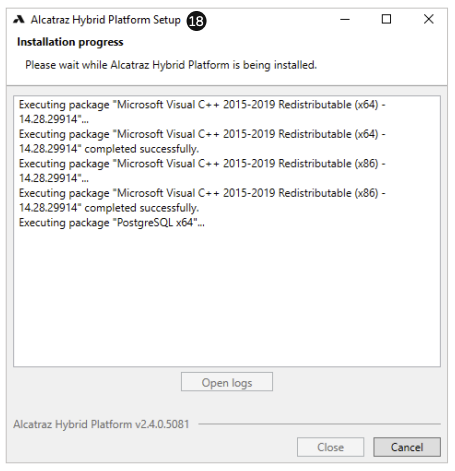
19. Press Close when the installation completes
20. Accessing the Admin Portal
Modify Configurations or Uninstall
For further configuration or uninstall use the installation file.
1. Double click on the AlcatrazAI-admin-portal-x.x.x-xxxx.exe file.
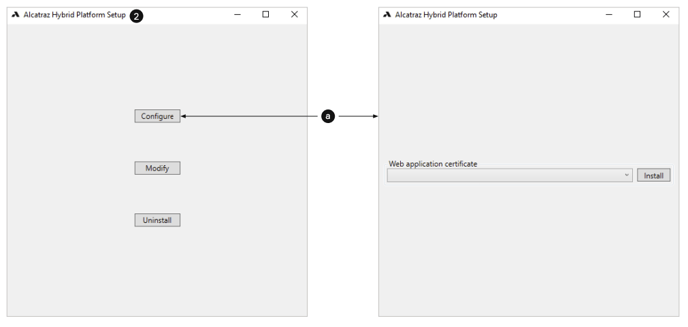
2. Once the platform is installed the loaded screen will display three options – Configure, Change and Uninstall.
a.To configure web certificates click Configure.
■ Select a Web application certificate from the drop-down list.
■ Click Install to install web application certificate.
b.Press Modify to make changes to the installation configuration.
c.Press Uninstall to remove a previous installation.