The Rock can enroll users by:
- Auto-enrollment
- Manual enrollment
- Web enrollment (Cloud Only)
In order to display badge numbers properly in the Admin Portal, be sure to configure your card format(s) under "Account Settings."
1. Auto-Enrollment
When the Rock is configured to do auto-enrollment, each time the user swipes their badge and enters through the door, the Rock is learning their face. Over time, with a minimum of 4 badge swipes that are spaced at least 5 minutes apart, the Rock will gather enough details to create a profile. How fast it can do this will depend on whether the user is looking at the Rock. Ensure good enrollment images by having the user centered and looking at the Rock. When the user completes enrollment, a profile is created with the user's Badge ID.
To configure auto-enrollment, log into the Alcatraz AI Admin Portal:- Go to "Device Management"-> "Devices" and select the Rock(s)
- Click on "Modify" at the upper right
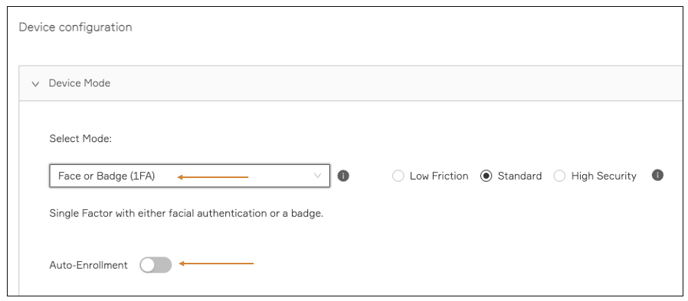
- Under "Device Mode," select "Face or Badge (1FA)"
- Select "Auto-Enrollment"; answering Yes to the message for wiring will toggle it on
- Click "Submit" at the bottom right corner of the page
Auto-enrollment events are viewed under Security Events:

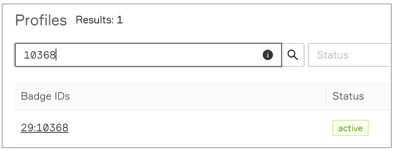
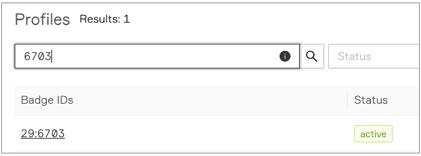
Created profiles can be viewed under Profiles:
IMPORTANT for auto-enrollment setup:
- The Rock will only auto-enroll if a person has access to the door and
- the Green LED wire must be connected to the ACS.
Tips for Successful Auto-Enrollment:
⇒ Remove a face mask or anything else blocking a large portion of the face
⇒ Look directly at the Rock when swiping your badge and stand directly in front of it about an arm's length away
⇒ The Rock is selective in capturing images for Enrollment; try not to make rapid movements to ensure good-quality images
⇒ If possible, enroll without other faces in the Rock's field of view to ensure the correct face is getting enrolled
Watch our short Auto-Enrollment Video.
2. Manual Enrollment
Manual enrollment is a quick process that enrolls the user after one badge swipe and following the steps on the Rock's display. Upon completion, the user's profile is created.
To configure manual enrollment for a dedicated enrollment Rock, log into the Alcatraz AI Admin Portal:
- Go to "Device Management"-> "Devices" and select the Rock(s)
- Click on "Modify" at the upper right
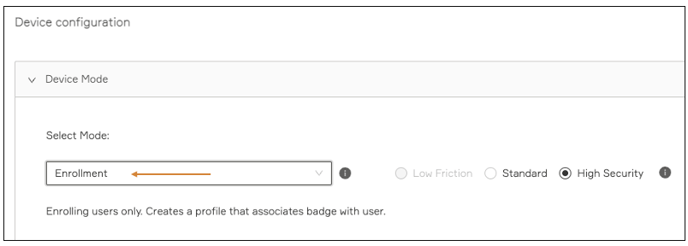
- Under "Device Mode," select "Enrollment"
- Click "Submit" at the bottom right corner of the page
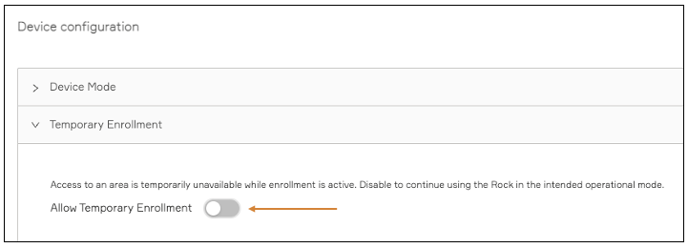
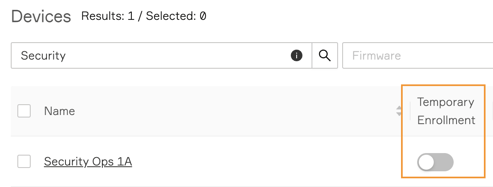
Manual Enrollment Temporary Enrollment Switch (optional)
- Optionally you can enable Manual Enrollment temporarily to quickly enroll a user by turning on "Temporary Enrollment" for any Rock. Note that access to the door will be unavailable until you turn it off.
- The toggle to control manual enrollment temporarily (on/off) is located beside the Rock's Name on the Devices page.
Manual enrollment events can be viewed under Security Events:

Created profiles are viewed under Profiles:
Download the Manual Enrollment Guide for step-by-step instructions for completing a Manual Enrollment at the Rock.
Tips for Successful Manual Enrollment
⇒ Remove a face mask or anything else blocking a large portion of the face
⇒ Look directly at the Rock when swiping your badge and stand directly in front of it about an arm's length away
⇒ The Rock is selective in capturing images for Enrollment; try not to make rapid movements to ensure good-quality images
⇒ If possible, enroll without other faces in the Rock's field of view to ensure the correct face is getting enrolled
3. Web Enrollment (Cloud Only)
This enrollment feature allows a user to enroll without the need to have a physical badge or a badge reader connected to the Rock. Web enrollment is managed in the Alcatraz AI Admin Portal. Invites are configured and sent out from the Admin Portal. The user must receive an invite to enroll. The instructions in the invite will guide the user to use their phone or computer camera.
This feature is only available to customers utilizing an Alcatraz-hosted cloud system. It is NOT available on on-prem systems.
To use web enrollment, log into the Alcatraz AI Admin Portal:
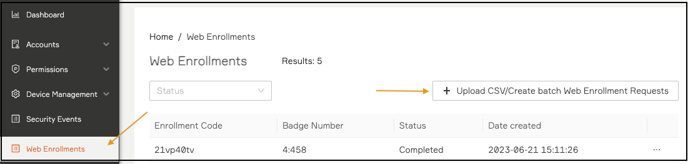
1. Go to "Web Enrollment" and click on "Upload CSV/Create batch Web Enrollment Requests"
2. Select the "Card Format" to be used for the associated badge numbers.
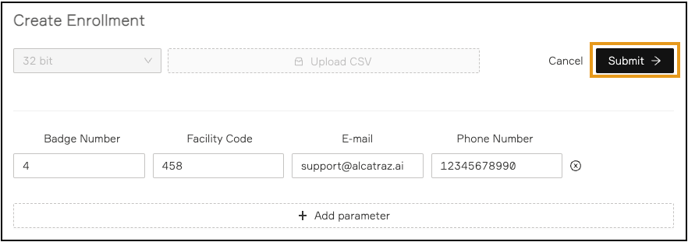
3. To create a single enrollment request, select "+ Add parameter" and then enter the appropriate "Facility Code," "Badge Number," and "Email" address. NOTE: Phone numbers are not supported at this time and do not need to be entered.
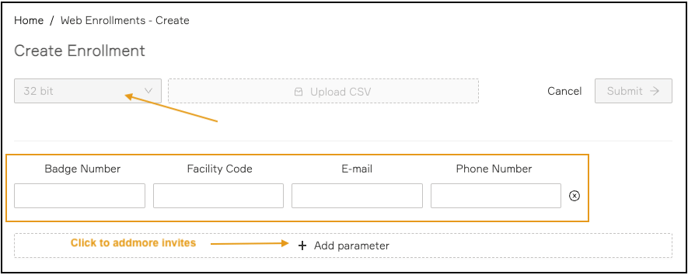
4. Click "Submit" to send the invite.
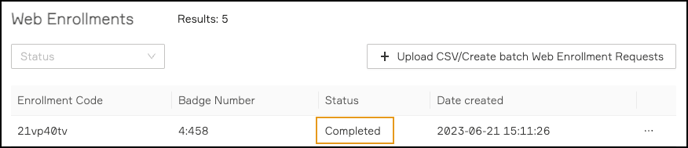
5. The user will receive the invite and follow the instructions to enroll. Upon successful completion of enrollment, the status will display "Completed."
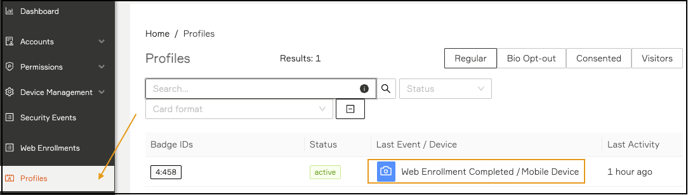
6. Under the "Profiles" tab, a new profile will be created for this new enrollment, and the "Last Event" column will display "Web Enrollment Completed/Mobile Device."
By default, enrollment invites are valid for one day. If you would like to increase this time, have your Account Administrator contact Alcatraz Support.
Tips for Successful Web Enrollment
⇒ Remove a face mask or anything else blocking a large portion of the face
⇒ Enroll in a well-lit area
⇒ Hold your phone straight out in front and slightly raised, an arm's length away
⇒ The app is selective in capturing images for Enrollment; move your head slightly and try not to make rapid movements
⇒ Make sure there are no other faces behind you and in the field of view
Upload a CSV file
Optionally, a CSV file can be uploaded to send out bulk invites for Web enrollment.
Click here to download the sample headers required.
Watch our short Mobile Enrollment Video.