There are two ways to update the network settings for a Rock:
- Create a QR code that contains the network settings and 'show' it to the Rock. This is the only valid method for a Rock not currently accessible via the local network or if the Alcatraz Platform server location needs to be changed.
- Change the settings in the Rock's WebUI and reboot the Rock.
Method #1 - Using a QR Code
To use this method, the "Activate QR Code" setting must be enabled for the Rock. When the setting is enabled, this icon will be displayed on the Rock.
![]()
Before taking the Rock offline for network changes, be sure to enable the setting in the Admin Portal.
If the Rock has been deleted from the Admin Portal and the icon is not displayed, a Factory Reset of the Rock will reset all settings and enable QR code reading.
- Follow these steps to create the QR code and 'show' it to the Rock: Generate a QR Code
Method #2 - Using the Rock's Web UI
To use this method, the Rock must have an IP address and be accessible on the local network.
The following network settings are required:
- DHCP (including an NTP server)
OR
- Static (including the following)
- IP Address
- Subnet Mask
- Default Gateway
- DNS Server
- NTP Server
- Follow these steps to log into the Rock's Web UI: Log Into the Rock's Web UI
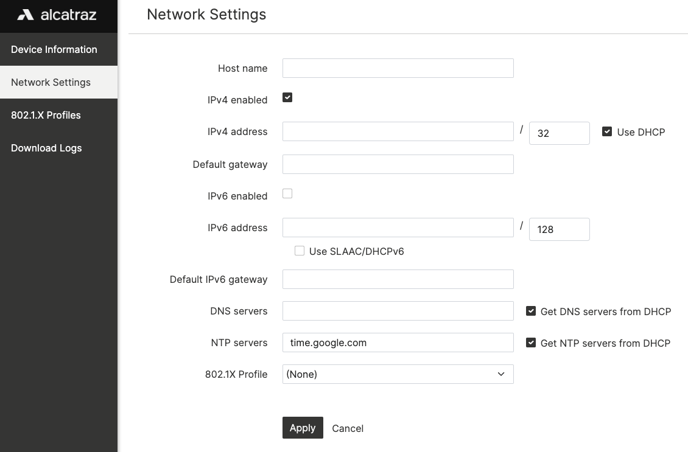
- Select "Network Settings" on the left and make updates as needed (see pic below).
- Click "Apply" to save the settings.
- Reboot the Rock for the settings to take effect. You can do this by cycling PoE+ power or using the "Reboot" button on the Rock's configuration page in the Admin Portal (Admin Portal v2.7.0+ and Rock firmware v3.4.0+).